While it has been discussed in length in the articles below,
https://powerapps.microsoft.com/en-us/blog/the-powerapps-component-framework-and-the-powerapps-cli-is-now-available-for-public-preview/
https://docs.microsoft.com/en-us/powerapps/developer/component-framework/overview
https://debajmecrm.com/2019/04/26/in-depth-end-end-walkthrough-develop-your-custom-controls-using-power-apps-component-framework-and-use-it-on-your-crm-interface/
Today, I’ll show you a quick demo of how to build a simple Start-Stop Clock customcontrol and further embed it on a D365 entity form

Demo here: https://www.youtube.com/watch?v=JbOTo6oPafM
Below are the pre-requisites:
- Install NPM – https://nodejs.org/en/
- Install Power Apps CLI (command line interface) – http://download.microsoft.com/download/D/B/E/DBE69906-B4DA-471C-8960-092AB955C681/powerapps-cli-0.1.51.msi
- Developer command prompt of Visual studio 2017 or later
Step 1: Project setup
Open Developer command prompt of Visual studio 2017 or later

Navigate to any local directory
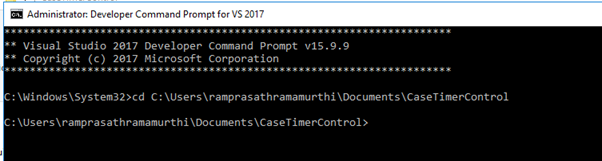
Run the below command:
pac pcf init –namespace <specify your namespace here> –name <put component name here> –template <component type>
(do note there are two hyphens)
For instance: pac pcf init –namespace CaseTimerControl –name CaseTimerControl –template field
“namespace” is the namespace that you want to provide for your controls.
“componentname” is the name of the control. “template” – Being it a pre-release, only two values are supported for this – field and dataset

Project is now successfully created

Run the command “npm install” as advised. It will install all the dependencies

Dependencies are installed successfully

Your project folder will look like below:

Step 2: Setup Manifest file of the custom control
We will just focus on two files under the below folder.
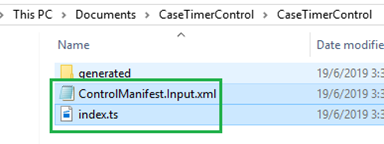
Open the ControlManifest.xml in any suitable xml editor of your choice. I used notepad++
What does a Manifest file mean, it is a file which contains metadata of a control. For example, the files of a computer program may have a manifest describing the name, version number, license and the constituting files of the program.
The ControlManifest.xml file would look like below:

Let’s look at each xml tag in detail.
In the <control> tag:
1. The ‘namespace’ and ‘constructor’ share the same name of the framework project we created earlier.
2. ‘display-name-key’ – the display name which will appear for the control in CRM. I used ‘TimerControl’
3. ‘description-key’ – the description for the control while will appear in CRM. I used ‘TimerControl’ again.
The control tag in the xml file would now now look like:

Next, we need to set the properties for the control to which this control would be associated to:

I will associate the field type ‘SingleLine.Text’ for this control – meaning in CRM, for the field of data type ‘SingleLine Text’ – this custom control can be used.
In the <property> tag, below element signifies:
name – the name of the property
display-name-key – the name of the property which will appear in the CRM when this control is configured
description-key – Description for the property to appear in CRM
usage – three values are allowed: bound, input or output. It is used to determine if the property is meant to represent an entity attribute that the component can change (bound) or read-only values (input)
of-type – denoted data type of each property. If the usage is specified as bound, then for each of the properties you can only bind it to the corresponding field type as specified here, refer – https://docs.microsoft.com/en-us/powerapps/developer/component-framework/manifest-schema-reference/type
Further, if you need the control to be associated to multiple data types, you can include them in the type group tag as below:

Our xml file would finally look like below:

Step 3: Develop the custom control
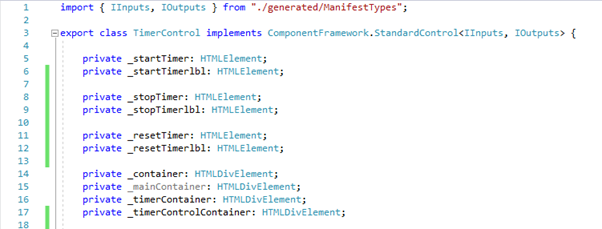
Here, we will develop the custom control using the file index.ts file. Open it in a suitable editor. I used VS2017.
You will see a skeleton class with some methods already declared. We just need to implement the methods where appropriate.
First of all, we will need to declare the variable of the control like below:
You may download the full source code here: https://github.com/prasath2k4/TimerControl
Step 4: Build, Run and Deploy the PowerApps Custom Control
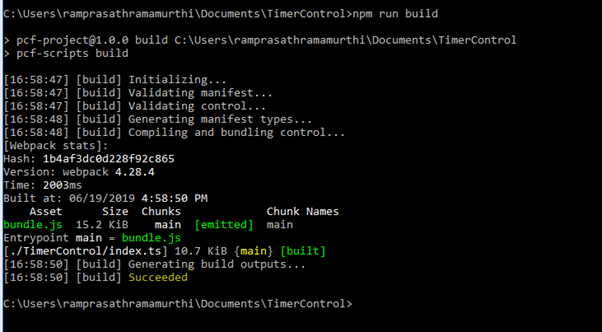
Run the command ‘npm run build’ – it will build and show the status.
Run the command “npm start” to view the control in local test harness via a browser


To stop execution, press Ctrl + C on the command prompt window and press ‘Y’.
Now we need to put it in CRM. We need to take this control a solution file. For that, lets create a folder named ‘SolMan’ under TimerControl folder.

Navigate to this path in the command prompt:

Run the below command now:
pac solution init –publisherName MyTimerControl –customizationPrefix mytc
(note the double hyphen)
publishername and customization prefix can be anything.

Run the below command now:
pac solution add-reference –path C:\Users\ramprasathramamurthi\Documents\TimerControl
(path refers to the project folder)

To generate the solution file, run the below command
msbuild /t:restore

Ensure you the see the message ‘Build succeeded’. Further run the command,
msbuild

Wait until you see the message ‘Build succeeded’:

When you open the ‘SolMan’ folder and navigate to Debug folder, you can see the solution file here.

Step 4: Embed PowerApps custom control to Dynamics 365 entity form
Import the solution into CRM.

Go to any entity and create a text field named ‘Timer’ on a UCI form designer.
Go the field properties, then to ‘Controls’ tab and add the custom control we created and enabled it for ‘Web’.
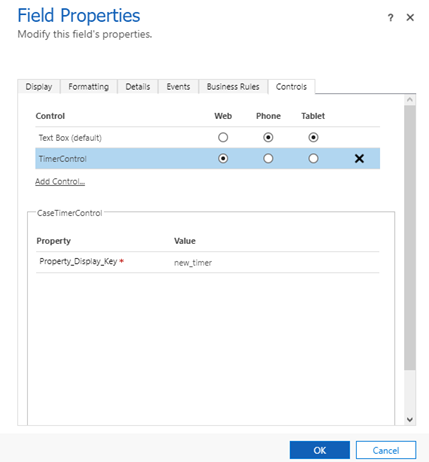
Click Ok and publish all customizations.
Now open a case form, you can see the control being rendered there. There you go!

There are plenty of beautiful controls out there: https://pcf.gallery
Do leave a comment if you face any challenge in doing the above operations.
Thank you for your time!
Cheers
***Lets make CRM Simple Silly***

could you please explain how to make it run automatically once open the form of case and stop when save the form to measure the duration of creation case
LikeLike